
Replacing sash cords on older windows
Windows manufactured today typically use compression jambs or tension springs to keep windows in position. But older windows, which are still found in many homes, rely on cords attached to the windows that have a weight concealed within the window jambs to provide a counterbalance to stay in position.
Many homeowners want to keep authentic older windows, and part of the proper maintenance that’s required to keep them working is replacement of those sash cords every 20 to 50 years to keep the windows from falling shut and breaking.
Replacing sash cords isn’t difficult. It takes about an hour and requires a delicate touch and working with components that are unfamiliar to many contractors.
Older windows will vary in some details, but the basic principles and components for replacing sash cords will be similar. The main thing to remember is to be very careful and be gentle when prying or removing old components. Replacements are often hard to find.
The counterbalances in older windows typically consist of vertical cylindrical weights with a loop at the top. They rest unseen in the travel paths within the window jamb, and are usually accessed via a small compartment at the bottom of the window channel covered by a removable block. The cord is tied to the loop at the top of the weight, runs up the travel path and over a pulley where it is attached to the window sash.
Sash cord is typically ¼ inch for small to medium-sized windows and ⅝ inch for larger windows. When purchasing replacement cord, look for cotton or cotton with a nylon core. Do not use nylon cord as it will jam in the pulley wheel.

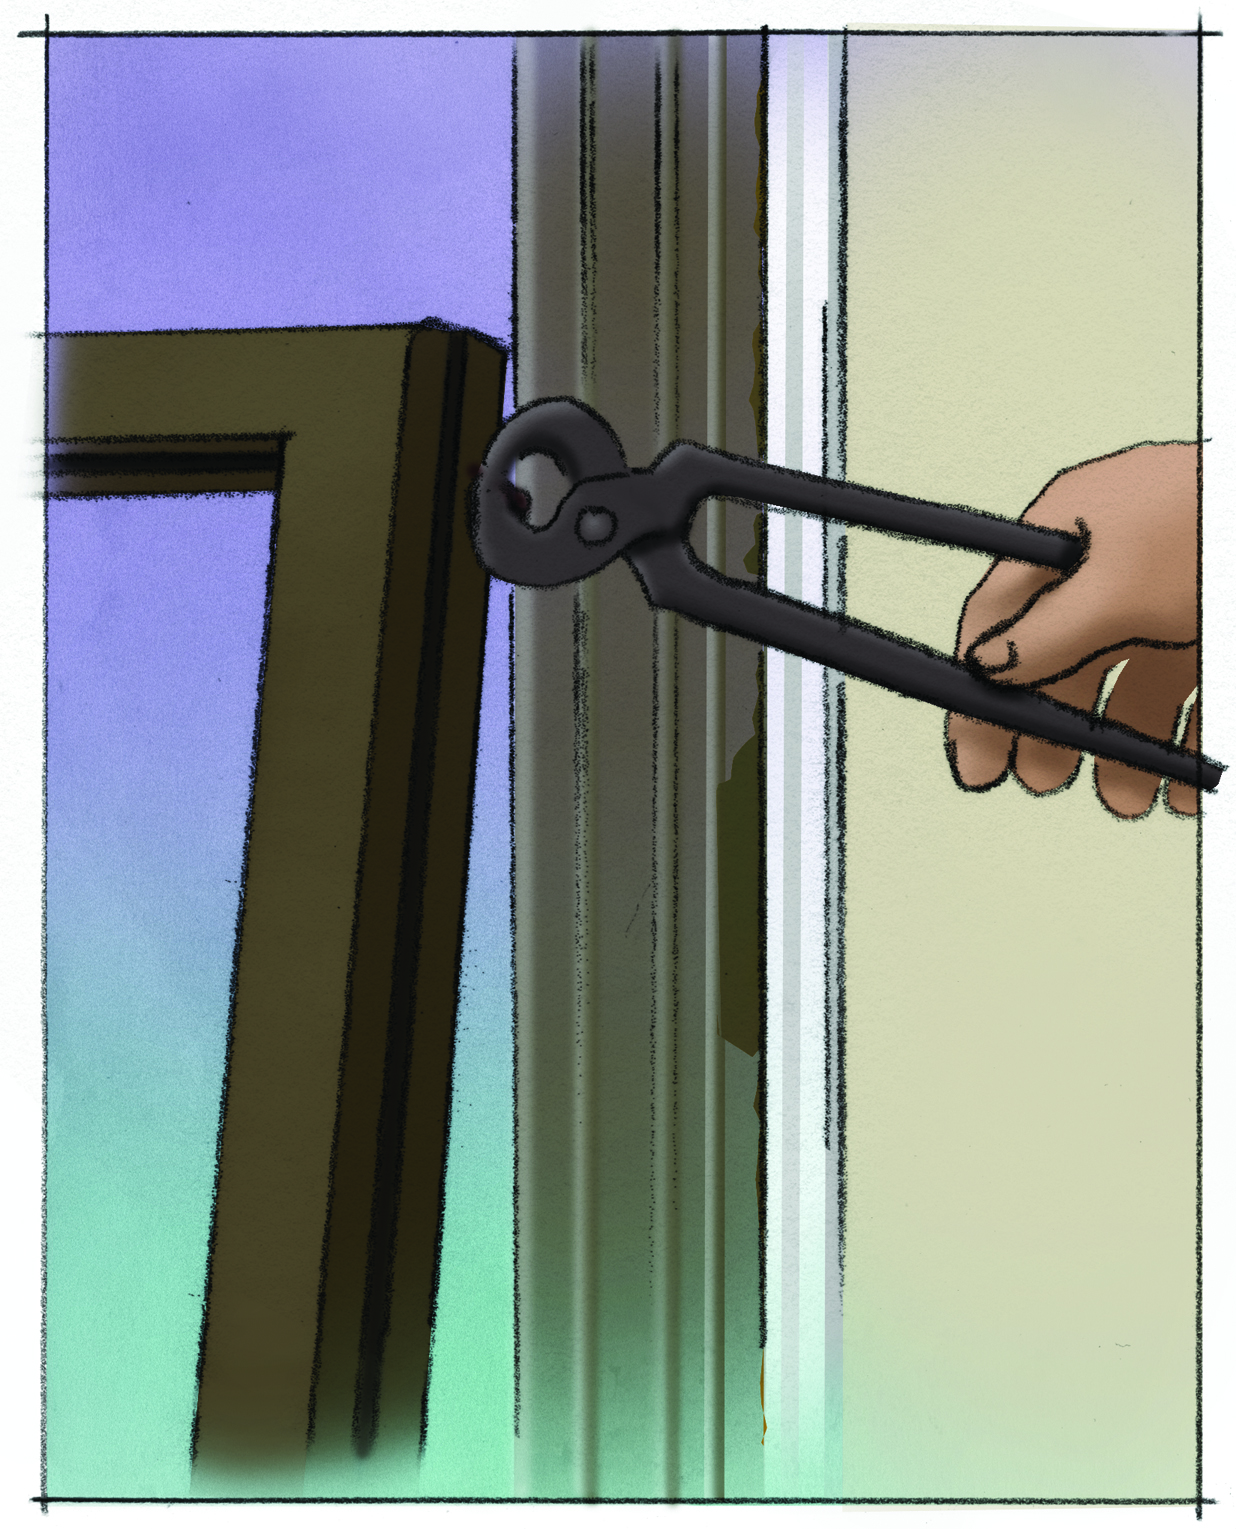
Carefully pry the window stops away from the jambs with a small trim pry-bar, making sure the sash doesn’t fall out.
Step 1
Carefully pry the window stops away from the jambs with a small trim pry-bar, making sure the sash doesn’t fall out. If metal guides are installed for the window to slide along, you’ll have to remove one of them. Securely prop the window open and remove the screws from the metal guide, then pull it down and out.
If only one sash cord is broken, the sash will pivot out and you can replace just that one. However, while you have the window apart, it’s wise to replace both cords with new ones so you don’t have to repeat the process right away.
Remove the weight through the access hole and cut away any remaining cord.
Step 2
The travel path access cover is typically a lower wooden piece held in place by a screw. This might not come out very easily, especially if there are a few coats of old paint on it. You may have to score around it with a utility knife and carefully spread the jamb apart to remove it.
Remove the weight through the access hole and cut away any remaining cord. Clean any debris from the travel path and make sure the pulleys work freely. Make sure all cord is removed from the sash as well. These sometimes run down channels in the sashes and are held in place with one or more small nails.
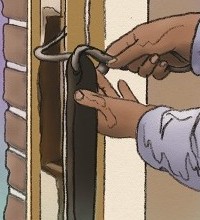
Run some new cord. You can probably feed a length of cord over the pulley and down through the travel path, but sometimes it’s easier to drop a weighted string down through, tie that to the cord, and fish it back up through the travel path.
Step 3
Run some new cord. You can probably feed a length of cord over the pulley and down through the travel path, but sometimes it’s easier to drop a weighted string down through, tie that to the cord, and fish it back up through the travel path.
Either way, start with a length of cord that is at least 12 inches longer than you think you need. Once it is fished over the pulley and into the travel path, tie it to the weight with a simple knot and place it in the access hole.
Step 4
Pull the cord to raise the weight to its maximum height and then cut it about 2 inches longer than it would be if it was in the side channel with the window sash resting at the bottom. Place the sash into the opening, approximately in its final position but leaving room to access the sash cord channels, run the cord into the channels and nail it in place. Trim off any excess cord, leaving ½ to 1 inch beyond the nails if it will fit in the channel. Repeat on the other side.
Step 5
After testing the sash to make sure everything operates smoothly and the weights properly counterbalance the sash in any open position, reassemble the window. Start with the wood pieces to cover the access hole, then replace any metal guides and reattach the stops. Resealing with caulk and some touch-up painting may be necessary.
