
How to remove molding without damaging the wall
One of the first steps when remodeling a room is to remove the existing crown molding from the ceiling and baseboards. Here is how to remove molding without damaging the wall. As molding is usually reusable, remove it carefully so you don’t break it and can repurpose it in another room.
- Start at an end, never in the center of the molding.
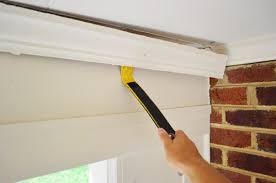
- Use a razor knife to cut along the paint line right on top of the molding so when you pull it off, you won’t damage the wall. This step is important if the trim is connected to the wall by multiple layers of paint or if the seam between the trim and the wall has been caulked.
- Slip a thin pry bar in between the wall and the molding. Tap it with a hammer until the trim comes away from the wall just slightly. Remove the pry bar, and slide a couple of wood shims between the molding and wall. That action will pull the molding away from the wall a little bit more, and help protect the wall from denting when you eventually take the molding off of it.
- Repeat the process all along the way to remove molding without damaging the wall: Loosen the molding with the pry bar and hold it in place with the shims.
- When the molding is about 1/4 inch away from the wall, use a second, heavier pry bar to get enough leverage to pull it all the way off.
- After you remove the molding, use pliers to pull the nails out. Don’t try to drive them out from back to front with a hammer; you’re likely to damage the face of the molding and render it unusable.
- Store the molding until you’re ready to install the molding in another room .
Repair damaged molding
It’s not always necessary to remove all of the molding. Instead, it’s possible to repair damaged sections and leave the rest in place. To remove only the damaged sections:
- Use a pencil to mark which sections need replacing.
- Use a rotary tool with a straight cutting bit to cut out the damaged molding in between the pencil marks. A caution: Cut just deep enough to remove the wood molding, but not into the wall.
- Slide a pry bar between the molding and the wall and tap it with a hammer to loosen the molding. Then, use another pry bar to grab the molding from the bottom. Gently pry the molding—and its nails—away from the wall until it comes completely off.
- Use a hammer claw to remove any nails that did not come loose from the wall.
— Sharon O’Malley
