How to install glass block

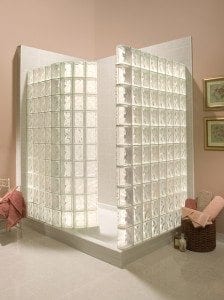
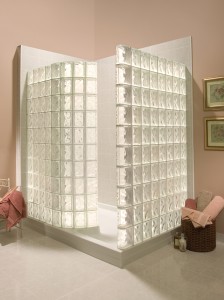
Even a single glass block shower wall adds light to the space and elegance to the room. Installation is straightforward for most systems and manufacturers.
The following instructions on how to install glass block are for a Pittsburgh Corning’s ProVantage glass block shower system installed over a standard fit shower base 60 inches wide by 32 inches deep. Installations of other glass block products and other dimensions may vary slightly, but the basic steps for how to install glass block to create a shower surround will be the same.
Assuming a properly installed shower base is in place, start by lining the base with rosin paper or cardboard to protect it during installation of the glass blocks.
How to install glass block – Step 1
The ProVantage system comes with a pre-packaged number of blocks designed to fit standard shower bases, including curved end blocks to provide a finished look on the top edge and at the corners of the wall. If you are using another system, measure the length and width of the wall, adding ¼ to ½ inch for mortar joints between each block and at the end of each run. Test fit the blocks without any mortar to ensure a proper fit.
Step 2
Mark the centerline along the length of the shower curb with a grease pencil or permanent marker. At the wall(s) where you will be installing the glass block, use a level to plumb a line from that curb centerline up the wall to just below the final height of the wall, typically about 76 inches. These lines represent where you will be fastening the anchors.
Step 3
Place all anchors, spacers and the first course of glass blocks so they are out of the way while you work, yet still within easy reach. The ProVantage system uses anchors on every course, but with many other systems anchors are installed every second course, starting with the first course.
Prepare the anchoring compound. The ProVantage system uses silicone sealant and a horizontal spacer to set the first course; other systems use mortar. To use silicone, apply a ¼-inch bead along the lines you drew in step 2 and set the horizontal spacer with anchor attached. With mortar, use a margin trowel to spread a full bed of mortar along the curb or sill. Use enough mortar to ensure a ¼-inch joint along the bottom.
[tip id=”10413″]Step 4
Now you’re ready to set the first block. Apply dabs of silicone to each corner of the vertical spacer and press it into place, sliding it over the anchor in the horizontal spacer. Apply silicone dabs on each corner of the other side of the vertical spacer, as well as a sealant bead along the bottom of the first block and press into place.
Continue with spacers and silicone. Apply sealant in all four corners of the spacer, press against the last block set, apply sealant to the other side’s four corners, as well as at the bottom of the next block, and continue pressing blocks into place for the entire first course. Remember to use the smooth-edged blocks for the last block in the row.
Level the first course. With the ProVantage systems, you’ll use the provided wedges to level the blocks. Carefully slide a flat-tip screwdriver under any blocks that are low and slide the wedges under the horizontal spacer.
With mortar systems, add or remove mortar as necessary to ensure the course is straight and level. You’ll also need to insert spacers similar to those used with floor tile between all blocks in a mortared glass block wall at this time.
Step 5
Set the second course. Apply silicone or mortar to the top of the first course, press in the horizontal spacer with anchor attached and fasten the anchor to the centerline on the wall. Apply sealant to the spacers and blocks as you did with the first row and continue as you did in step 4.
Repeat these steps, attaching anchors to the wall when specified for every course. Remember to check level to confirm the wall is straight, level and plumb as you build.
Step 6
The ProVantage system requires the sealant be allowed to cure at least overnight. If you are using a glass block and mortar installation, remove and excess and let the block set for about an hour before smoothing all joints with a striking tool.
Then apply a grout designed for glass block between all joints. This is applied much like a tile grout and should be completed within about 60 minutes before the grout cures too much to smooth and remove from the glass surface. Use two coats of sealer on the grout to protect against mold and mildew.
Tools you’ll need
- screwdriver
- long-nose pliers (for grabbing spacers between blocks)
- rubber mallet
- 4-foot level
- caulk gun
- utility knife
- margin trowel
- rubber float
- bucket
- tile/grout sponge
- mineral spirits
- rubber gloves
- safety glasses

