How to install cork flooring

Demand for cork flooring continues to grow as people realize that cork is durable, available in many styles, soft underfoot, and provides great sound insulation.
While cork floors are a new choice for homeowners in this country, they’ve been around for centuries in other parts of the world.
Demand continues to grow here as people realize that cork is durable, available in many styles and soft underfoot, and provides great sound insulation. Plus, cork is harvested from the same trees every decade or so without cutting the tree down, making it a truly renewable resource. Here’s how to install cork flooring to delight your clients.

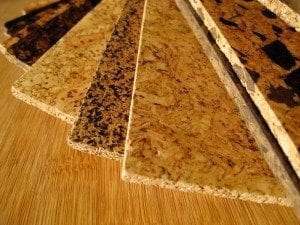
Cork flooring is available in planks or tiles, and as glue-down, glue-less (interlocking) and floating floors.
The flooring
Cork flooring is available in planks or tiles, and as glue-down, glue-less (interlocking) and floating floors. Calculate the square footage of the room to be covered and add 10 percent for cut-offs and waste. Let the new flooring acclimatize to the indoor environment for at least three days before installation.
Preparing the area
Before you start to install cork flooring, prepare the area by removing all furniture, baseboard, floor trim, heat registers and closet/entry doors.
Locate any squeaks or loose subfloor material and re-fasten with screws. Subfloors do not have to be perfectly level, but apply a self-leveling compound to any large depressions/areas of deflection. Fill all seams in the subfloor with the same leveling compound. Allow compound to dry completely dry and sand any ridges or high spots with a pole sander and 100-grit sandpaper.
Different types of cork flooring require different subflooring material. Some cork can be installed over linoleum or other old flooring and some cannot, while others require a nearly perfectly flat, smooth surface. Follow the cork flooring supplier’s recommendations for the best subflooring.

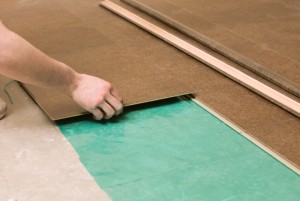
Begin by placing the tongue of the first plank toward the wall and the groove facing the room. Work in one direction by sliding the tongue of the next plank into the groove of the previous one until it clicks into place.
How to install cork flooring
To install an interlocking floating cork floor, determine how wide the last row of planks will be by measuring the width of the room and dividing by the face width of a plank.
If the last row of planks that result will have to be ripped down to less than half the width of a plank, rip the first row to a width that will closely match the last row so the room will be symmetrical.
Begin by placing the tongue of the first plank toward the wall and the groove facing the room. Work in one direction (typically left to right) by sliding the tongue of the next plank into the groove of the previous one – usually at a slight angle – until it clicks into place. Maintain a 3/8-inch gap between the wall and the planks around the entire perimeter of the room.
Cut the final board of the first row to length and being the second row in the same fashion. You may be able to use the cut end of the previous row (if it is long enough) to begin the next row. If not, cut a short length from the first board to make sure all seams are staggered across the entire floor. Continue this across the entire area, working in the same direction and staggering seams.
Use a piece of scrap flooring to help undercut doorjambs and casings. Place the scrap on the floor to use as a height guide next to the jamb/casing and cut it with a flush-cutting hand saw or an oscillating multi-tool with a wood-cutting blade.
Install transition strips at doorways, and then replace all baseboards and moldings.
Glue-down cork
Some cork flooring requires adhesive to install. This is usually either contact cement or mastic. Installation for these floors is more similar to a tile floor installation. Lay out the pattern, snap chalk lines and apply the adhesive with a brush or trowel. Once installed, the cork tiles should be rolled with a 150-pound tile roller to ensure proper adhesion to the subfloor.
Finishing
Cork floors can be finished with paste wax and then buffed to a fine sheen. However, many professionals recommend a water-based urethane. Be sure the finish you apply is compatible with the cork material.
Note: While cork is extremely resistant to mold and mildew, it is not recommended for basements or other rooms that are prone to moisture, as the seams of a cork floor may swell.
-By Rob Fanjoy

