
How to install a tankless water heater
 To install a tankless water heater, carefully evaluate the gas, electric and water supply to ensure the system will work properly.
Tankless water heaters can produce three to four times the BTUs of a conventional water heater so verify that the current gas line size, length and gas meter can provide sufficient gas flow to the unit.
According to Dan Gagne, owner of two Ben Franklin Plumbing franchises in the San Francisco Bay area, most installations require a new dedicated ¾-inch line to the unit. Most also require electricity. Water supply lines should be a minimum of ¾ inch with the minimum water flow rate and pressure needed to operate the system recommended by the water heater manufacturer. If the flow rate of the water supply doesn’t exceed the minimum (usually 1/2 gallon per minute), the unit will not start.
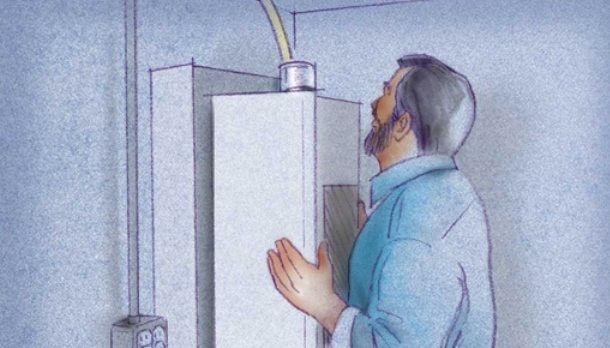
“One of the biggest problems we see is locating the unit too far from the fixtures,” says Gagne. This results in long wait times for hot water. With its small size, there are many options for locating the tankless water heater, and outdoor installations are popular in warmer climates. The best place may not be where the old water heater was located.
Indoor installations of tankless water heaters require venting to the outside using Category III stainless steel exhaust, so it makes sense to minimize the length of the vent run and elbows by installing the unit on an exterior wall, in relatively close proximity to gas and water lines. Follow local codes and the manufacturer’s instructions regarding clearance. Note: Tankless water heaters can be installed directly on a wall.
Another consideration is the hardness of the water. Over time, hard water can cause scale buildup that can overheat the heat exchanger. A water softening system will reduce scale buildup. The water heater should be cleaned with a solution of water and vinegar or CLR to remove buildup, as needed.
To install a gas tankless water heater indoors with horizontal venting, follow these steps.
Step 1: Mount the tankless water heater
With the water shut off and the old water heater removed, mount the tankless heater so it lines up with the planned vent piping. In a concrete or brick basement, mount the tankless water heater directly on the wall using the mounting brackets supplied by the manufacturer.
Step 2: Install vent

Cut the opening for the vent hole using a reciprocating or hole saw.
Run a vent using Category III stainless steel exhaust pipe from the tankless water heater out a side wall with horizontal venting at a downward slope.
Vertical venting through the roof is another option. Consult the manufacturer’s instructions for the maximum distance you can run the venting and the number of elbows. The heater cannot be common-vented with any other gas appliance or vent stack, and vent termination must be at least 3 feet from any operable window.

Run a vent using Category III stainless steel exhaust pipe from the tankless water heater out a side wall with horizontal venting at a downward slope. Vertical venting through the roof is another option.
A concentric direct vent kit will provide almost everything you need for a typical horizontal venting installation, including an appliance adapter, horizontal termination for up to a 10-inch wall thickness, a 94-degree elbow, a 12-inch wall plate and screws. Follow the manufacturer’s instructions or template to determine the location of the hole for venting. At the center point drill a ¼-inch hole from the inside to the outside at a downward angle of 4 degrees dropping down approximately ½ inch for a standard 8-inch wall.
On the outside wall, outline a circle using the vent thimble. Use the pilot hole as a guide to cut the opening for the vent hole using a reciprocating or hole saw. Remove any shingles to allow the flange thimble to rest flush against the outside wall. Remove any debris or insulation from the opening.
When cutting the hole, cover the vent of the water heater to prevent any debris from falling into the flue. Remove this cover prior to completing the installation. Some manufacturer’s instructions will recommend you temporarily hang the heater to determine where the hole should go, then remove it completely while you cut the hole.
Dry fit the vent system from the heater to the vent termination, including wall plates. Make any adjustments necessary. Disconnect the venting and reassemble according to the vent manufacturer’s recommendations. When fully engaged at the seams, the female end will overlap the male end a minimum of 1 inch.
Use three self-tapping screws at each outer pipe seam. Seal each overlapping area of the outer pipe with silicone if recommended by the vent manufacturer. Apply silicone sealant/latex caulk around the vent section where it passes through the wall plate and around the wall plate to keep moisture out. Maintain vent clearances and install vent supports as required by the vent manufacturer.
Install a condensation drain so condensation doesn’t run back into the unit. Condensation in the venting will destroy the heat exchanger if it runs back to the unit.
Step 3: Connect water

Tie in new hot and cold water lines to the existing water lines with copper pipe.
Tie in new hot and cold water lines to the tankless heater. Measure the copper pipe to fit, and cut it with a rotating pipe cutter. Clean the ends of each pipe with 120-grit emery cloth before soldering. Use a wire brush to polish the inside of the fitting.
Dry fit the copper pipe to make sure it fits and mark the place for a pipe clip to hold the pipe in place. Pre-drill holes for the expansion anchors and secure the pipe clip in place.
Apply soldering flux on the pipe, slip pipe and connectors. Heat the fitting with a torch for about 10 seconds. Once the metal is hot enough, apply the solder. Touch the solder to the joint and work around the fitting on both sides until the joint fits.
Insulate both the cold and hot water supply lines. Install a shutoff valve near the inlet of the water heater for service and draining. High water pressure will put excess pressure on the plumbing system. Test the water pressure and install a water pressure regulator if pressure exceeds 60-70 psi.
Install an isolation valve kit for easier maintenance; periodic flushing is recommended to remove scale.

Install a T-valve to the existing gas line.
Step 4: Connect gas supply
Install a T-valve to the existing gas line and run a corrugated stainless steel gas line from the valve to the tankless heater. The inside dimension of the line should be ¾ inch. Gas piping should be installed in accordance with local codes and utility company requirements. The supply line should be a minimum of ¾ inch black steel pipe or other approved gas piping material.
Install a manual gas appliance shut off valve at the gas connection. Install a sediment trap (This is a short section of pipe running downward from the gas line). Test for leaks by turning on the gas shut off valve to the water. Use a soapy solution to test for leaks at all connections and fittings. Bubbles indicate a leak. A flex line with ¾-inch connections doesn’t mean it actually measures ¾ inch on the inside. Most are ½ to 5/8 inch when measured on the inside and will not supply enough gas to operate a tankless heater properly.
Step 5: Connect heater

Attach the gas supply line to the shutoff valve and connect the water supply line to the water heater following manufacturer directions.
Plug in the water heater. Turn on the gas. Before connecting the water supply pipe, open the shutoff valve and clean out sand, debris, caulk, etc. Connect to the water inlet and check water flow. After running the heater for five minutes, turn off the water supply and remove the screen to check for debris.
Follow start-up procedures provided by the manufacturer.
The unit measurement
To determine the size and type of tankless heater to install consider the volume of water the unit needs to heat, measured as flow rate in gallons per minute; the temperature of the cold water entering the unit; and the desired temperature of the hot water produced.
The size and number of whole house tankless water heaters needed will be driven by flow rate and that is determined by the number and types of fixtures running at one time. The installation may require more than one tankless water heater installed in parallel to meet the hot water demands, especially for simultaneous shower usage.
Also, the colder the groundwater, the less hot water can be produced by a unit for a given flow rate. For example, a tankless heater in Michigan would need to be 33 percent to 50 percent larger than one in Florida for the same number and types of fixtures. The difference between the temperature of the hot water exiting the heater and the cold water entering the unit is called the temperature rise.
To accurately size the water heater, measure the actual water flow from the faucets and showerheads. Tankless sizing software available from some manufacturers can assst you in choosing the model, number of units and accessories for a tankless installation.
–By J. Costin
