
How to Finish Drywall
Knowing how to finish drywall can take your drywall job from ordinary to professional. Here is how to finish drywall.
By Rich Nation
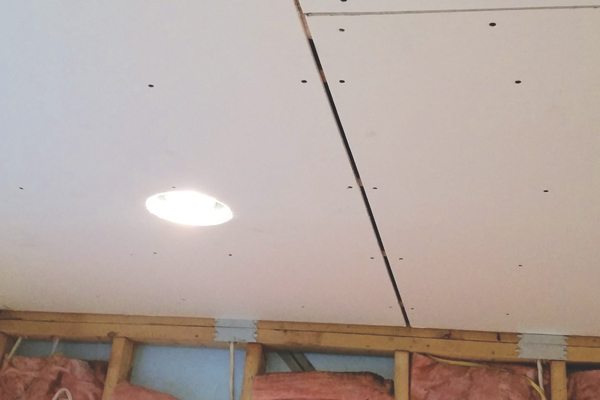
We all know that bad taping or finishing of drywall can make a good job look horrible. This is the one trade that can literally make a job look either professional or sub-par. So assuming that the drywall is correctly installed, the screw heads are all set to the correct depth, and the corner bead is installed, follow these steps to finish drywall like a pro.
Tools you will need to finish drywall
- Utility knife
- Carpenter’s pencil
- Mud pan
- Mud knives of different sizes (6-, 8-, 10- and 12-inch, and maybe other sizes depending on the job)
- Tape reel or banjo
- Extension cords
- Mixing drill
- Mud beater (mixing paddle)
- Bright drop light
- Sanding block
- Pole sander
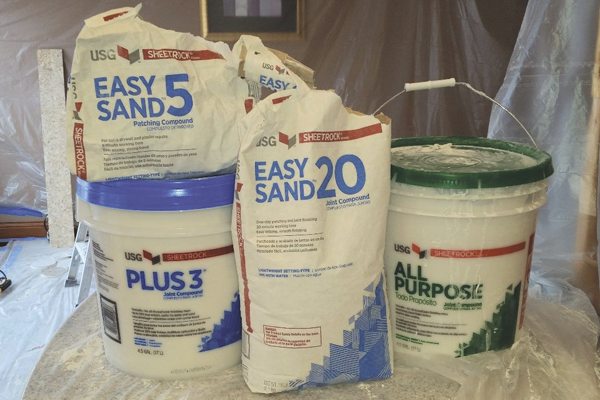
Materials you will need to finish drywall
- Fiber-mesh tape (for taping corner bead)
- 250-foot rolls of paper tape
- All-purpose mud for tape coat (usually green lid)
- Lightweight mud for bed and finish coats (usually blue lid)
- Bag of quick-set mud (20, 45, 90 or 210 minutes for back-filling gaps in drywall)
- A couple of empty 5-gallon buckets
Backfilling gaps in drywall
We backfill gaps in the drywall seams to make a more solid foundation behind the tape. This, in turn, will extend the lifespan of the seams. Let’s start by determining the number of gaps on your job. If there aren’t many gaps, then simply mixing up a couple of pans of mud will suffice. If there are many gaps, then you will want to mix up a whole bag of quick-set. Once you have determined how much quick-set mud you will use, go ahead and mix it up. Most back-filling can be done with a 6-inch knife. Make sure to fill in seams that have uneven drywall on either side. A tip for finishing drywall that will make drywall finishing easier.
Once all of your gaps are filled and the mud is set up, you can start taping.
A few tips when mixing mud:
- Add water to your pan/bucket before you add the powder. This will make the mixing process much smoother.
- It’s easier to add water to thick mud than to add powder to thin mud. What this means is that, while mixing, make sure you do not mix the mud too thin. If you have to add powder to already-mixed mud, it will be lumpy. Instead, add small amounts of water at a time until you get your correct consistency.
- Mix the quick-set to the proper thickness that you need for your gaps. Many times you will need what I call “framing mud” to fill big gaps so that the center of the mud does not belly out too much or even fall out.
- Do not use hot water. It will cause the quick-set mud to set up quickly. Be careful to run the hot water out of hoses that have been sitting in the sun for too long.
Applying your tape coat
Mix up your all-purpose mud for the tape coat. You’ll want to add about 8 ounces of water to a full bucket of mud. This is my preference for taping with a banjo. When hand-taping, I will only use about 4 ounces. This isn’t a big difference. But I like my mud a little thicker when hand-taping since it’s less messy.
Taping with a banjo
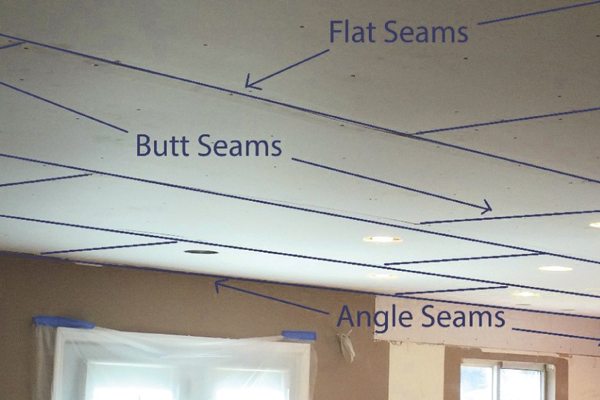
Most of us will be taping with a banjo, so I will explain that process in a little more detail. Load the tape on the back side of your banjo and reel it through to the inside. Make sure the tape follows along the top of the banjo on the inside. Add your all-purpose mud under the tape and your banjo is ready. You always tape your butt joints first, flat seams second, and angles third.
With banjo in hand, take your opposite hand and grab the tape. Set this hand (with the tape) to the seam and hold it in place. Take the banjo hand and stretch it out to the end of your seam, or as far as you can. Do this until you reach the end of your seam, and then tear the tape with the blade on the end of the banjo.
Repeat this process until you have a decent amount of tape on. Then go back and wipe down your tape with a 6-inch knife and mud pan.
Hand-taping
This process follows the same rules. The only difference is that the tape will be applied differently. Instead of a banjo, you will be using a tape reel.
Take your 6-inch knife and dip it into your mud pan. Make sure the mud takes up the whole width of the knife. Spread the mud onto your seams and then place the tape over the newly placed mud. Stretch the tape out over the mudded area and then rip it at the end. Now, take your 6-inch knife again and wipe down the tape/mud to remove all excess mud.
Tips for the tape coat:
- Only run enough tape that you can get wiped down within 20 to 30 minutes. If the tape/mud sits on the drywall too long, it will start to dry, making it harder to wipe down smoothly.
- When wiping your tape down, do not apply too much pressure, or you will wipe all of the mud out and cause the tape to bubble.
- Cut the tape as precisely as possible; you don’t want to fall too short on your seams or go too far.
- After taping the angles, make sure you push the tape into the corner and bed it in nicely. This will make for a nice inside 90-degree angle.
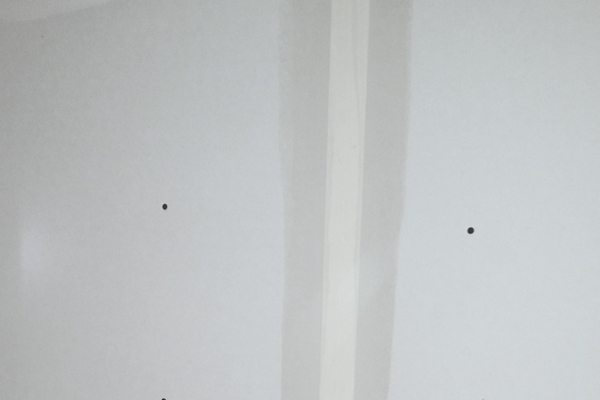
Bed Coat
Before you start the bed coat, run through with a scraper knife and scrape down any “mud boogers” or mud blobs on the drywall. Also, sand down any high spots that could interfere with the bed coat.
Now take your lightweight mud and add about 2 to 4 ounces of water to it, and mix it thoroughly. If the mud is too thin, it will be sloppy and hard to work with. This coat will be done with a 10-inch knife. You will bed in the flat seams, butt joints, angle seams and corner bead.
Apply the mud across the seam evenly to about ¼- to ½-inch thickness. After wiping down the mud, you should have a coat of mud that is 1⁄8- to ¼-inch thick. Some situations will call for more or less, but this is the average.
Then, with your knife on one side of the “mud swipe,” gently apply pressure and pull to the other end with an even stroke. Do the same with the other side of the mud swipe. The idea here is to wipe off the excess mud and to give you smooth sides.
Next, take your knife and run down the center of the “mud swipe” with even pressure all the way down to the other end.
This coat will shrink a little bit; its main purpose is to be a filler coat, hence the name “bed coat.”
Tips for the bed coat:
- When wiping the middle of your seams, make sure not to wipe too hard or too light. This can either leave a dip or a crown in your seam.
- If areas need to be floated out, do the same method as above except go wider. An example would be: Instead of a 10-inch-wide mud swipe, do a 20-inch mud swipe. The width will vary depending on your circumstances.
- Thinner mud shrinks more, and conversely, thicker mud shrinks less.
Finish coat
Before applying the finish coat, take your sanding tools and sand down all of your lap marks and high spots from the previous coat. The goal is to sand down any areas that will interfere with the next coat of mud.
The finish coat is pretty much the same as the bed coat except the mud should be a little thinner and the knife is a little wider. The reason for this is that we want all of the little imperfections filled in really well.
Now add 4 to 8 ounces of water to a bucket of new mud and mix thoroughly. This coat will be done with a 12-inch knife, so this coat is wider than the last. You will finish out the flat seams, butt joints, angle seams and corner bead.
Apply the mud roughly ¼-inch thick. This coat is also thinner than the last. After wiping down the mud, you should have a coat of mud that is about 1⁄16- to 1⁄8-inch thick. Some situations will call for more or less, but this is the average.
Take your knife on one side of the “mud swipe” and wipe down the mud all the way to the other end. Do the same on the other side of the “mud swipe.” As always, wipe down the middle of the seam.
This process is pretty much the same as the previous coat, but this time we are a lot more thorough and focused on detail.
Tips for the finish coat:
- This is your last coat, so pay a lot of attention to detail. This will make sanding and touch-ups easier.
- Have your bright light shining down the walls as you finish. This will help you see your trouble areas better.
- Remember this coat will shrink a tiny bit, so do not wipe down the mud too tight.
Sanding
Sanding is the highlight of the entire job – the part you have been waiting for. Grab a pencil, sanding sponge and bright light, and pick a corner. Typically it’s best to start at the top and work your way down. However, there is no set sequence to sanding.
Sand out the seams and look out for high spots, low spots, edges, scratch marks and pock marks. As you run into these different imperfections, circle them with your pencil. After sanding the entire job, come back around with a pan of lightweight mud and touch up all of the pencil marks.
Next, make one more pass through everything with the light to double-check that nothing got overlooked. You will sand down the touch-ups on this pass also.

Tips for sanding:
- Run the sanding block in circular motions so that you don’t create “trenches.”
- There is such a thing as over-sanding, so be careful to avoid it. If you start seeing the tape “fluff” through, then you have gone too far. We call this “burning the tape.”
- Sanding is the most tedious part of taping. Make sure you switch out sanding sponges to make easy work of it.
- The light should always shine down the wall, not at it.
Conclusion
There you have it, how to finish drywall from start to finish. Taping and finishing drywall can be tough for beginners, but we experts know how to make a wall look flat and smooth all the way.
Tape on!
Richard Nation is a drywall expert with experience dating back to 2001. You can find him at Nations Drywall.
