6 problem-solving drywall tips, painting tips and more
 Try these problem-solving drywall tips, house painting tips, concrete cleaning tips, reciprocating saw tips and more.
Drywall tips: Roll-on drywall compound
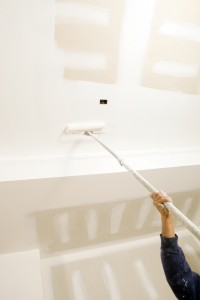
When it’s time for that final coat of joint compound on your drywall seams, reach for your paint roller. First, add a little water to a bucket of compound and mix well to thin it slightly.
Then, dip your paint roller (½-inch nap or greater) completely into the compound, lightly shake off some of the excess and slowly roll it over the center of the seams.
Drywall seams are typically finished to about 12 inches wide, so the 9-inch wide paint roller lays a nice coat of compound with nice straight edges.
Next, remove the wet compound with your 12-inch taping knife and your seams are perfectly smooth.
House painting tips: Remove paint drips from wood trim
To easily remove dried paint drips and blotches from wood trim after painting walls – even older drips left by a previous painter – take a paint scraper and lightly scrape the spots from the wood.
Most latex paint drips will fall away easily. You may have to use a utility knife in corners or other hard to reach spots.
Then, wrap a thin cotton rag around the scraper blade and soak it with denatured alcohol and rub that over the paint spot to remove any residue. You can touch up if needed with matching stain or a stain marker.
Concrete cleaning tips
If your work on a home has kicked up a lot of dirt and grime that has marred your customer’s concrete driveway or sidewalk, Pro Construction Guide reader Gilberto Martinez from Caguas, PR, has a great tip for easy cleanup.
Make a thin mixture of Portland cement and water in a 5-gallon bucket and brush the mixture on the dirty concrete with a stiff-bristled push broom.
Brush hard enough to loosen the dirt, but don’t brush the mixture completely away – leave a thin layer of the wet mixture on the surface. Let the mixture dry in place and the concrete will have a brand new appearance.
Custom sanding block
To sand woodwork and moldings with complicated profiles, make a custom sanding block from a scrap piece of rigid foam insulation. Take a scrap of the molding to be sanded and adhere a piece of sandpaper to it with spray adhesive.
Push the sandpaper tightly into all the curves and notches with a putty knife or scraper blade. Then run the foam insulation over the sandpaper to create a reverse profile of the molding.
Next adhere a piece of sandpaper to the insulation in the same way you did on the molding. You now have a perfectly matched sanding block. Make several with progressively finer grits.
Homemade sharpening strop
Revive dull utility knife blades and save money by using a homemade sharpening strop. First, grab a piece of scrap wood about 3 inches wide by 12 inches long.
Then cut several strips of 300- or 400-grit sandpaper to the width of the wood. Stack them together and staple or tack them to the wood on one end. When a blade gets dull, simply run its edge along the sandpaper as you would with a regular knife and honing stone.
After a few passes, your blade will be razor sharp again. When that sheet of sandpaper becomes clogged or dirty, simply tear it off and a fresh piece is ready.
Reciprocating saw guide block
When you need to make a nice, square cut with a reciprocating saw (when cutting studs to insert a new header, for example), make a guide block from a piece of scrap wood.
Use scrap of the same dimensions as the piece you’ll be cutting and with a table saw make a saw kerf nearly all the way through that piece of scrap. Line up that saw kerf with the line you want to cut and secure it with screws.
Even the floppiest of reciprocating saw blades will follow the path of least resistance and be guided nicely along that kerf all the way through the piece you want to cut.

