How to replace a window
Before starting any window replacement, consider how the existing windows are made, how they are installed and how well they operate. Since there are so many different types of windows, you need to understand your replacement options. A typical double-hung window can be replaced with a custom vinyl window by inserting the new unit within the existing jambs. This is the most common and usually the simplest way to replace a window, because you don’t have to modify the area around the window.
To replace a window that has no separate jamb, it must be removed completely. In that case, a jamb-to-jamb replacement is not an option. If the existing window operates properly, the opening is probably square, and a vinyl replacement will be easiest to install.
Determine if it is preferable to install a new window within existing window jambs or remove everything down to the rough opening. If the jambs are intact, a jamb-to-jamb custom vinyl replacement is the easiest option. However, if you need to replace a window that is custom, it may be preferable to remove the entire window and re-work the rough opening to install a standard window. Also examine the exterior (i.e. siding, veneer, stucco) where it meets the window. How difficult will it be to remove and replace?
Measure the replacement window
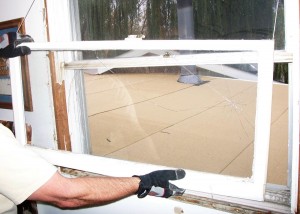
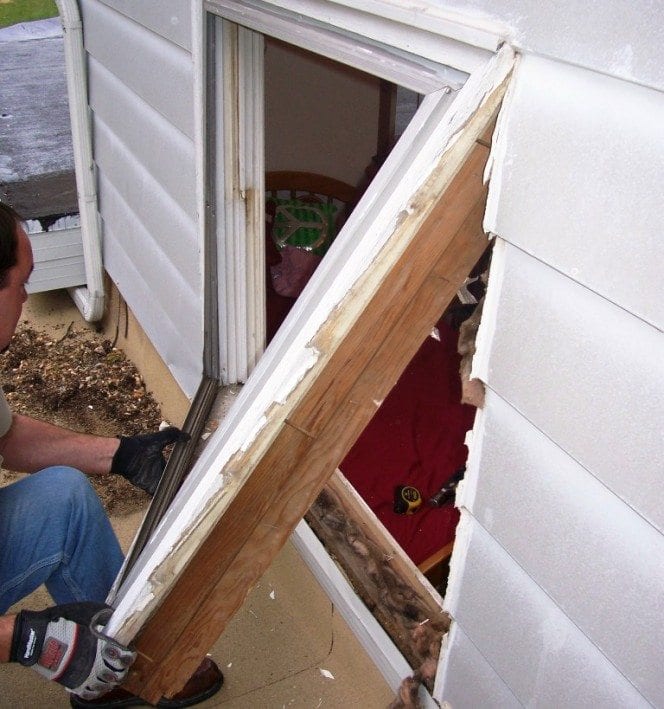
(photo 1) The existing window was removed so the rough opening could be modified to receive the new window.
Since custom sized vinyl windows can’t be returned, it is critical that you get an accurate measurement. Most replacement windows are made in ¼-inch increments. Measure to achieve the closest fit possible.
Make sure the end of your measuring tape is undamaged and your tape reads accurately. Take three measurements across the inside face of the window jambs. One near the top, one in the middle and one near the bottom. Use the smallest of the three measurements as your replacement window width.
Measure the existing frame diagonally in both directions. If the measurements are equal, the existing frame is square. Repeat the process for the vertical dimension, but measure from the inside face of the head jamb, to the sloped sill, just past where the sill meets the window stool. Again take the smallest of the three measurements.
To replace a window entirely, remove the window casing, so you can see and measure the existing rough opening. Never assume windows are the same size. Make a rough sketch and number each opening separately so you can keep track of each set of window measurements.
Remove old windows and prep the opening
If you are replacing a traditional double-hung window, with a custom, jamb-to-jamb, vinyl window, you will need to remove the inside stops and the two sashes. A wood window has two sets of stops that hold the upper and lower sashes in place (outside and inside) and a blind stop.
Carefully pry off (or unscrew) the inside stops so they can be reused. Cut the sash ropes and remove the lower sash. Let the counterweights within the frame drop, they can be abandoned in place. If access panels are provided, you can remove them, remove the weights, and reinstall the access panels.
Pry out the blind stop and remove the upper sash. Using your spade bit, drill three holes in both of the side jambs, the head jamb, and the stool. Spray in insulation until it fully fills the voids, and scrape off any excess. Scrape off any old loose paint or caulk, then sand and prime paint the surface of the jambs
Full window replacement
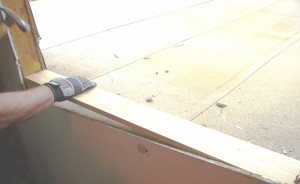
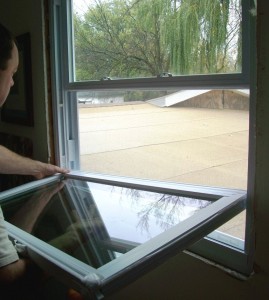
On this project (photo 1), a standard replacement window was used. The existing window, including the jambs, was removed so the rough opening could be modified to receive the new window (photo 2). Both sashes were removed to prevent broken glass and to make the unit lighter and easier to handle. After removing the screws which attach the jambs to the rough framing and cutting the caulk from the window to the siding, the entire frame was removed.
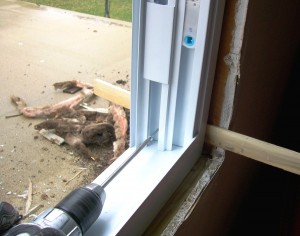
To reduce the vertical dimension of the rough opening so it would accept the standard window, a ¾-inch-thick filler was added at the bottom of the rough opening framing (photo 3). The new filler was checked for level. If any of the existing window framing is rotted or deteriorated, replace it with treated lumber prior to proceeding with the new window installation.
Set the new window in the opening
Whether you replace a window entirely or install a jamb-to-jamb replacement, if the lower horizontal surface of the opening is level, the new window should work properly. If it isn’t, shim between the rough opening and the bottom of the new window frame, or in the case of a jamb-to-jamb replacement, between the lower portion of the existing frame and the bottom of the replacement unit.
Set the new window in the prepared opening, and center it from side to side. Check if the sill is level and the sides are plumb.
[tip id=”6084″]How to square a window
To replace a window that isn’t square, you may need to shim. Typically any gap of ¼-inch or less can be shimmed. If the gap is larger, a filler piece will have to be installed to reduce the gap width to a dimension that can be shimmed. Cedar or composite material shims are always used in pairs, with the angled sides facing each other. One shim is inserted from the outside, and one from the inside.
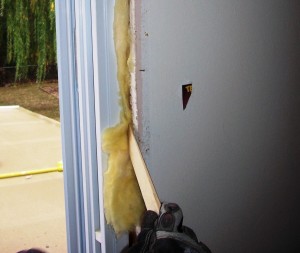
On the jambs, shims should be used wherever the new window is screwed to the framing (or existing jambs). Typically the holes in the jambs come pre-drilled in the replacement windows. Shims allow for adjustment and keep the sides of the window from bowing when the windows are permanently fastened. Verify the jambs are plumb before and after you insert the shims and attached the window. If the jamb is not plumb, remove screws and shims and start over. (photo 4).
To shim the bottom of the opening, place shims about 1 inch from either end and near the center of the opening. You may need to loosely fasten the window on one side at the head with a 2-inch wood screw. Insert the screw just enough to allow the window to open and close. Check the diagonal measurements of the window to be sure they are equal. Once they are, the window is square and should operate and lock normally. Never shim the head of a window or attach it to the framing. Windows are not structural, and any connection to the top of the rough opening can break the window and/or cause it to malfunction.
[tip id=”6108″]Complete the installation
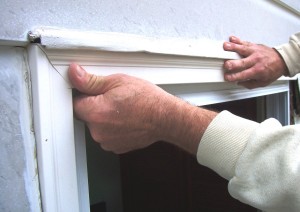
Once your window is shimmed, securely attached and working smoothly, score and snap off the excess portion of shims. Fill any gaps around the perimeter with loose insulation (photo 5).
On this project, new brick mold had to be cut and nailed around the perimeter of the new window to close the gap between the window and siding. The upper section was slipped behind the flashing at the top of the window and the perimeter was then caulked (photo 6). Finally, the new screen and removable sashes were installed, and after one last check for proper operation, the work was complete (photo 7).
–By Bruce Webb
What you will need
While every window replacement project is different, some or all of the following tools will be needed:
- Steel measuring tape
- Carpenters square
- Level Hammer
- Screwdriver
- Pry bar
- Putty knife
- 3/8 spade bit
- Paint scraper Utility knife
- Caulking gun
- Canned spray insulation

