
How to install rustic wood flooring
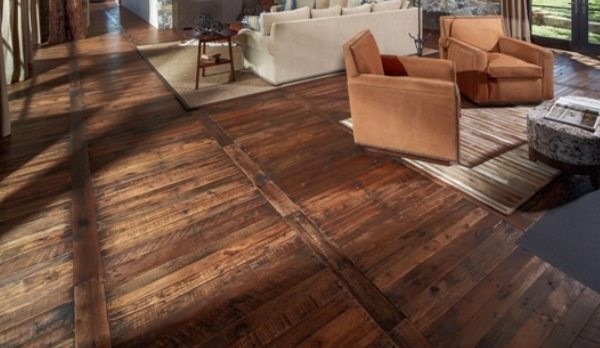 Rustic wood flooring is becoming more popular with homeowners as they recreate the easy style and rougher, more casual look of antique flooring.
Rustic grade is a term used in the flooring industry to denote hardwood that falls between the better natural grade and the rougher tavern or cabin grade flooring. It also refers to recycled wood flooring. And there is plain rustic wood flooring, which is a product that is made to look older, such as distressed laminate planks.
Step 1
To install authentic rustic-grade flooring, start by inspecting the wood. Rustic-grade wood flooring is sold in nested bundles of boards of varying lengths. Make sure your bundles have about the same number of long, medium and short boards. Bundles with too many short boards will cause installation problems and you’ll end up with a piece-meal appearance.
Step 2
When you have the bundles you want, sort the boards. Not all planks of rustic-grade wood flooring have to be the same width – that is part of what makes an authentic rustic look. Of course, in areas where two boards have to be butted against each other, you’ll need to use boards of the same width. This will also allow you examine the coloration and grain, and lay out the boards so the color and grain either match or complement each other.
Step 3
Acclimate your wood flooring before beginning the installation. Stack the boards in the room where they will be installed if possible and use thin strips of wood between the layers to promote air circulation. Depending on the weather and indoor humidity, acclimation can take two days to two weeks. Check the progress by measuring and recording the width of a few boards every day until they stabilize.
Step 4
When you’re ready to begin, lay the first board parallel to a focal point in the room, such as a long wall that is first seen upon entering the room. If the rest of the room isn’t square, floorboards that aren’t aligned with the wall in another area won’t be as noticeable. If your boards are tongue-and-groove, lay the grooved edge of the first boards toward the wall.
Step 5
Use 2½-inch cut nails or reproduction hand-wrought nails ordered from a historic hardware outlet. Never nail closer than ¾-inch from the edge of the board. Many wide plank floorboards are susceptible to cupping, so you may need to use three or even four nails at each joist through the face of each board to get a flat floor.
Drive the nails flush with the surface or use a nail set to drive them just below the surface without leaving “hammer tracks” in the face of the boards.
Rougher edges and visible gaps are part of the charm of rustic wood flooring, but some people want the rustic look without the dirt-catching gaps that are common with this type of floor. If that’s the case with your customer, definitely use tongue-and-groove boards, as the tongue will minimize the appearance of gaps while adding a bit of strength.
