
How to replace a door threshold

Slice the old threshold in two places, being careful not to slice too far through into the subsill underneath or the finished flooring inside. Remove the center section with a pry bar first, then the two ends.
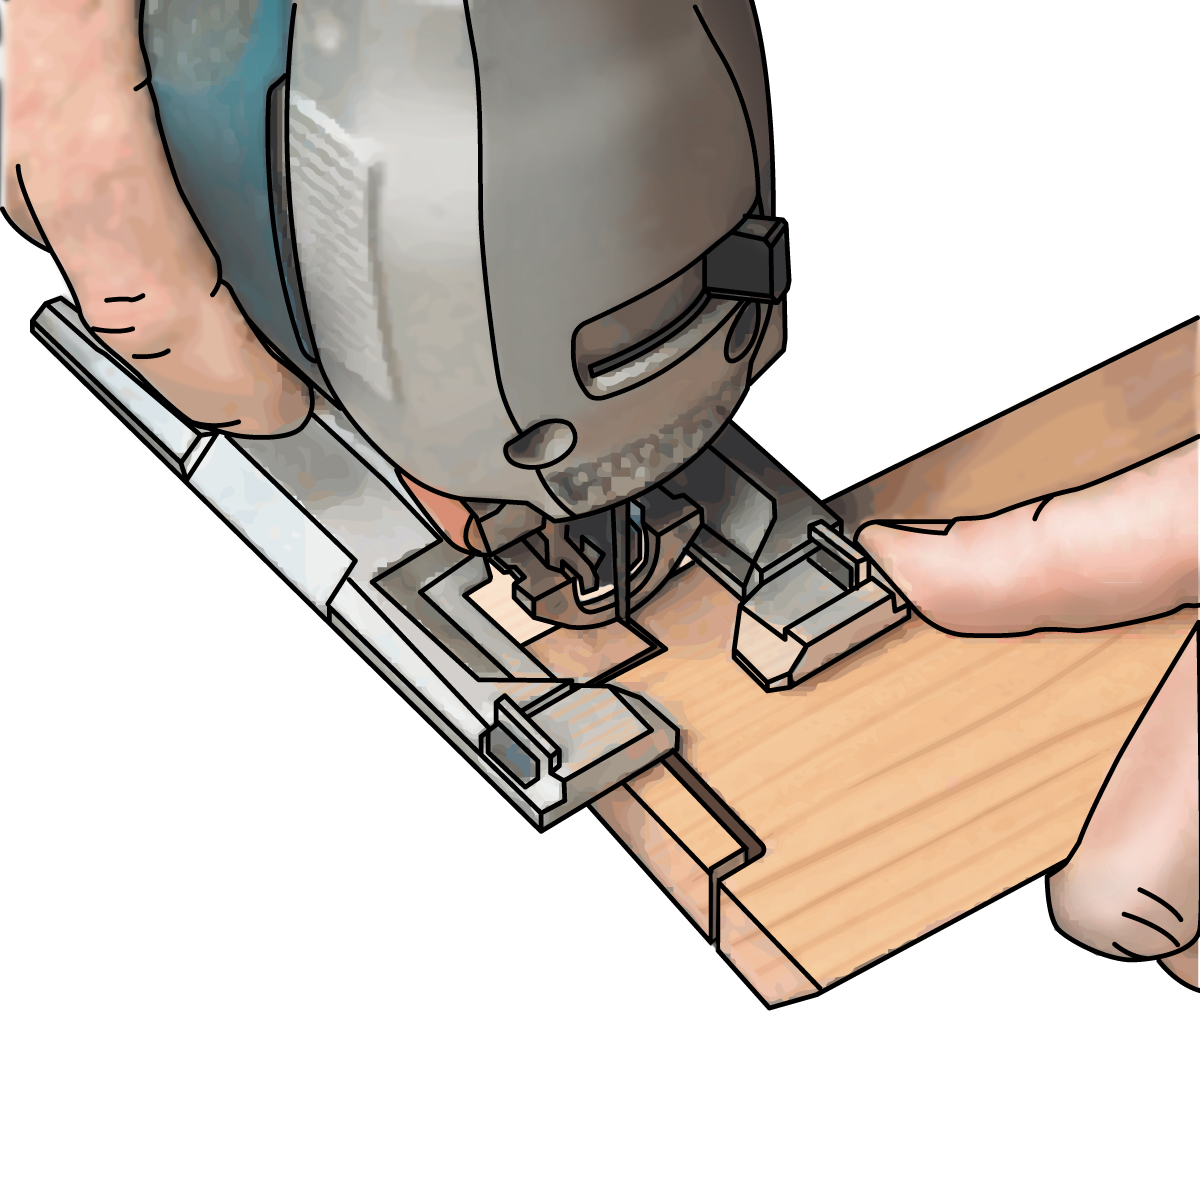
After carefully laying out the notches at both ends, cut them with a jigsaw and finish tricky sections with a handsaw.
After slipping the threshold into position under the door stops, gently tap it into place with a hammer and a wood block. Change the block’s position and tap the threshold in evenly – so one end does not get too far in front of the other.
If an exterior door threshold begins to deteriorate, the underlying framework will soon deteriorate as well. Steps for how to replace a door threshold are usually pretty straightforward. However, thresholds that have been neglected for years may also have rotten subsills, soft joists or stud ends, and even insect infestation that can complicate the job.
Before you start to replace a door treshold, have a replacement threshold ready that is at least 1 inch longer than the old one so you can trim it to the exact length. The new threshold should match the old threshold in width, thickness and profile as closely as possible.
Remove the storm door and any weatherstripping attached to the threshold. Using a reciprocating saw with a blade at least as long as the threshold is deep, cut the threshold in two places, each about 10 inches in from each jamb. Cut carefully, with the teeth of the blade about parallel to the surface and watch the tip so you don’t cut into the finished floor.
Don’t cut all the way through. Stop the cut just before any part of the blade cuts through to the subsill.
Use a flatbar to pry up the middle section; breaking through the nearly finished saw kerfs. Wiggle the ends away from the jambs if possible. You may have to split them with a hammer and chisel, but be careful not to damage the ends of the door stops or the subsill.
Examine the sub-structure and replace any rotten wood. Now would be a good time to treat this section with a water repellant/wood preservative and/or an insecticide.
Install a flashing layer with a self-adhering membrane such as used on roofing details. Let the front hang down just enough to cover the top edge of the toe kick and fold the back edge – or the side closest to the interior of the door – back onto itself to form a dam against water infiltration.
Mark, cut and install it
Lay out the notch on one end of the threshold to fit around the doorjamb. Carefully cut along the lines with a jigsaw. To lay out the notch on the other end, measure the width of the opening and hook your tape to the corresponding section of the notch and mark the other end. Cut that notch with a jigsaw as well. Trim the “horns” of the threshold so they are flush with the casing.
Treat all cut ends of the new threshold with the same finish and/or insecticide as the top surface.
Slip the new threshold into position under the doorstops, and then gently tap it into place with a hammer and a scrap block of wood. Tap it in evenly, so that one end does not get too far in front of the other.
Once it is tight to the subfloor, install cedar shims under the center at either end – but not under the “horns.” Arrange the shims in pairs so that the thin end of one rests on the fat end of the other, keeping the threshold from tilting as you shim it.
When the threshold is tight against the stops and casing, snap the shims flush with the subsill.
Squirt some expanding foam sealant under the threshold and immediately put the toekick under the flashing and tight to the underside of the threshold. Screw it to the subsill.
Run a bead of sealant between the threshold and each doorstop. Coat the wood with several coats of paint or spar varnish.
