
How to install granite countertops
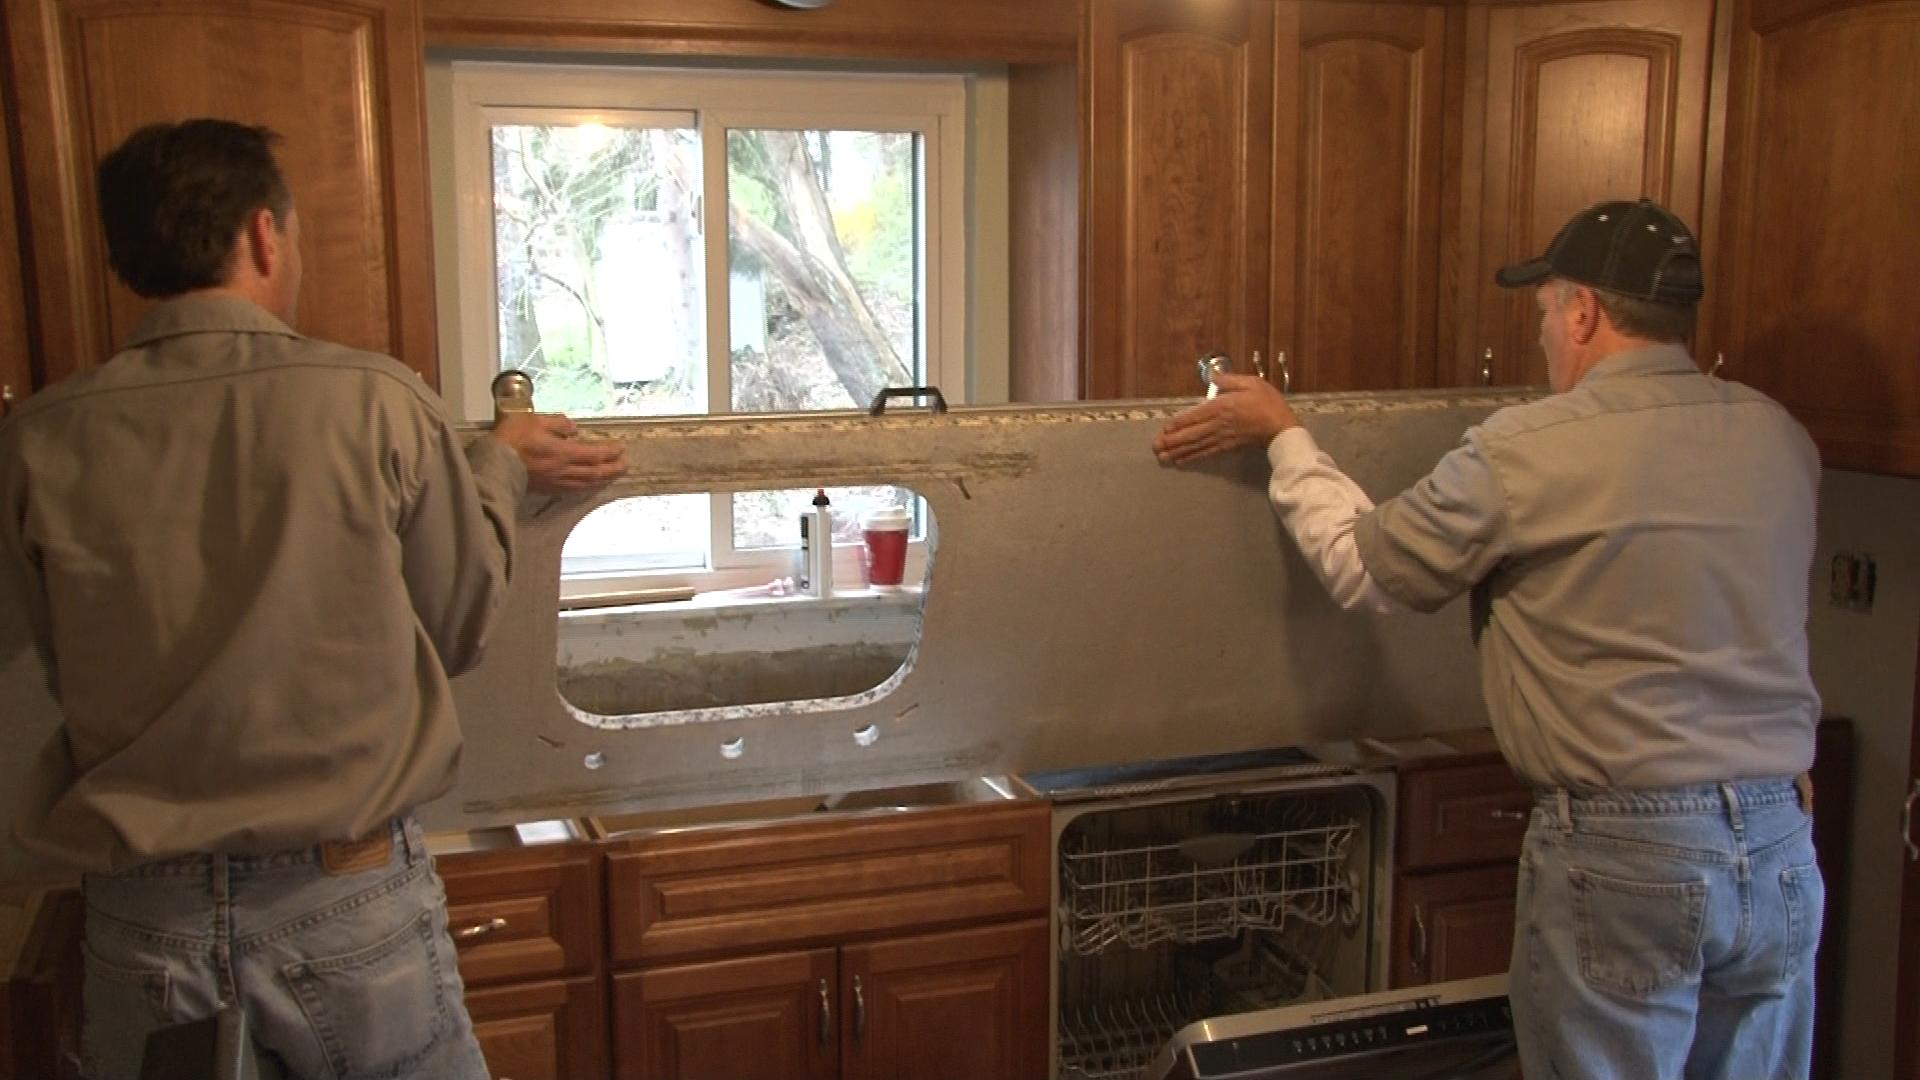
Always have at least one helper assist you when placing heavy slabs. Granite can crack or break under its own weight, especially at weak points such as near sink cutouts.
Granite countertops have typically been the domain of dedicated granite installers. Due to the nature of the material, it required highly specialized tools to achieve a quality installation.
However, with the rising popularity of granite countertops, standard shapes and sizes with pre-formed edges have become more available and reasonably priced, and installation techniques have evolved so that any quality contractor can offer this service. Follow these tips on how to install granite countertops.
Before you begin
Carefully remove any existing countertop materials, disconnect all gas and plumbing lines and remove appliances. Make sure all cabinets are level and securely fastened to the floor and wall.
The top surfaces of the cabinets must be within ⅛ inch of level over a 10-foot span. Wall surfaces must be plumb and within ⅛ -inch of a true plane over a 10-foot span. Exceeding these tolerances will result in excessive shimming and wide spaces of filler material.
Although some granite slabs more than 20 millimeters thick can be used without a full substrate to support the stone, typically a minimum of ¾-inch marine-grade or exterior-grade plywood must be laid on top of the cabinets to support the granite.
Drill pilot holes to avoid splitting the cabinet material and secure the plywood with screws. Heavy sinks may require additional framing or support to carry the weight of the sink and its components.
Measure precisely
Use Kraft paper or something stiffer to create an exact template of the countertop and other surfaces, such as backsplashes, to be covered with granite. Precisely mark sink or cook top openings, as well as any other cuts to be made in the granite. Be sure to include the overhang in the template.
With your customer’s color choice, pattern and edge choice selections, take the template to your local Home Depot or other material supplier, and order the countertop. Your supplier can advise you on the location of seams, if necessary. For a more precise installation, select a new sink that will fit the countertop exactly at the same time.

Dry fit the slab before adhering with a quality silicone adhesive. Pay careful attention to tricky areas such as achieving a tight fit along walls that may not be straight or square.
When the countertop arrives
You’ll need help to move the granite countertop into place. Be very careful, as granite slabs break easily – especially along their natural veins.
Dry fit the slabs. If any of the slabs need a slight adjustment to get a perfect fit, use an angle grinder set at 2,800 RPM and a 50-grit grinding disk. Grind as little as possible −just enough to get a perfect and level fit. If the surface you have ground is exposed, i.e. it doesn’t abut against an appliance, wall or another slab, you may need to bevel the edge to match the rest of the slab.

Make sure the slab is level from both side-to-side and front-to-back. Shim where necessary.
Change the disk to 100-grit. Grind the area again. Follow this with a 200-grit disk to leave a smooth edge.
Polish the edge using a 400-grit disk until the granite looks shiny. Finish with an 800-grit disk, which increases the sheen and finishes the polishing for many types of granite. For dense granite, you might need to polish the edge with a 1,500-grit disk and a 3,000-grit diamond sanding disk.
If the sink is an under-mount model, remove the slab and install the sink now. Set the granite in place. Carefully push all seams together as tightly as possible, and ensure the slab is level. Plastic or wood shims can be used to level the slabs, if necessary. Maximum spacing between shims is 2 inches.

Apply backsplashes with silicone adhesive once the slab has been set. Take great care to run a neat bead of caulk or sealant where the backsplash meets both the slab and wall.
Raise the slab carefully and place dollops of clear silicone sealer at 6-inch center-center spacing over the entire substrate. Pay special attention to sealing around the entire perimeter of under mount sinks. Carefully lower the slab back into place.

Whether you use an epoxy or other type of adhesive at the seams, the joint should be extremely narrow and almost invisible when done.
Fill the seams by applying a color-matched polyester or epoxy resin joint filler before you place the adjoining slab. Pull the pieces together tightly.
This allows the filler material to extrude out of the joint as the stones are pulled into alignment. You can mask both sides of the joints to prevent excess filler material from staining the surface. Joint seams should be no more than 1/16-inch.
Allow the epoxy and joint filler to set up. If the sink is a drop-in model, it can be installed once the epoxy and joint filler are dry.
If the granite countertop was not sealed by the supplier, apply a sealer recommended by the supplier following manufacturer’s directions.
−By Rob Fanjoy
