How to use a router

Professionals rely on routers to provide optimum results when mortising hinges, cutting shelf dadoes, replicating profiles on hard-to-find period moldings, or creating custom moldings and trim details.
A router is a power tool that separates a true craftsman from a wood butcher. Why some contractors avoid routers often has to do with the fact that they can be complicated – and used incorrectly – can become hand butchers. To learn how to use a router properly, you first have to understand the basic construction and components of the router. Then you can choose among the various styles and options that best suit your construction needs.
Router styles
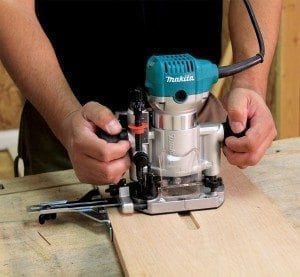
Routers are basically available in three sizes: compact laminate trimmers (typically with motors rated at less than 1 hp), medium-duty all-purpose units (1-1/2 to 2 hp), and heavy-duty production models (2 plus hp). Laminate trimmers can be easily used one-handed and some come with a variety of interchangeable fixed or plunge bases. Despite their size, they can be extremely useful and versatile for more than trimming laminate. If you plan on doing a lot of routing, or routing on thick stock or hardwoods, this is not the router for you.
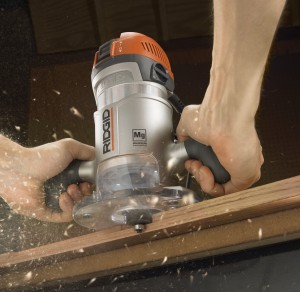
Medium-duty routers are the most recognized and come with a variety of bases. The fixed base is less complicated than a plunge base and is generally easier to use in conjunction with a router table. Most of these routers have two knob-shaped handles on each side of the base so the operator can grasp it with both hands. One-handed operation of routers in this category is advisable only on models that have a D-handle. Heavy-duty production routers are very similar to medium-sized routers, except their more powerful motors are designed for repeated, extended use in professional millwork and woodworking shops.

Many edge-shaping jobs are done with piloted bits that have a bead on the bottom of the bit that rolls along the unfinished edge of the stock as if it were a straightedge. Bits with the pilot on top require a template fastened on top of the work piece.
Router features
Professionals rely on routers to provide optimum results when mortising hinges, cutting shelf dadoes, replicating profiles on hard-to-find period moldings, or creating custom moldings and trim details. Most routers feature some sort of scale to set depth, but accuracy varies. To be sure, confirm the depth of cut with an aftermarket depth guide or by practicing on a scrap piece of stock.
The collets (the sleeve that holds the shank of the router bit – similar to a chuck on a drill) of most routers can be switched between ¼- and ½-inch. Laminate trimmers are almost always limited to ¼-inch router bit shanks. Generally, the bigger shank will give you a cleaner cut with less chatter and fewer ripple marks.
Few router operations are done freehand. Many edge-shaping jobs are done with piloted bits that have a bead on the bottom of the bit that rolls along the unfinished edge of the stock as if it were a straightedge. Bits with the pilot on top require a template fastened on top of the work piece. Still other router operations require the use of guide collars or edge guides. Many router users make custom templates, guides and jigs, but a variety of aftermarket products are available.
[tip id=”9750″]
Do not push or force the router – allow it to “feed itself” slowly while maintaining a firm grip and control over the tool.
How to use a router safely
The learning curve for beautiful results with a router can be a little steep for beginners. Fortunately, the safety learning curve is not very steep so you can get plenty of practice on scrap wood before you attempt to beautify an expensive length of hardwood.
- Always use sharp bits. Dull bits can “catch” the wood and twist the router out of your hands. Sharp bits will provide the best cuts with less burning and rippling.
- Make sure the work piece is secure. Clamp it to a table or saw horses so it remains flat and stable throughout the routing.
- Maintain a firm grip on the handle and make sure the bit is not engaged to the work piece (or anything else) before you start the motor.
- Feed the router bit from left to right (or counterclockwise if routing around the entire perimeter of a work piece) so that the cutting edge meets the wood first.
- Do not push or force the router – allow it to “feed itself” slowly while maintaining a firm grip and control over the tool.
- Unplug the tool when making adjustments or changing bits.
- Wait for the bit to stop spinning before setting the tool down.
- Never walk away from a router without securely tightening a newly inserted bit. The next guy to turn it on may not realize it isn’t tight, and a loose bit can fly out from the collet and do a lot of damage.
–By Roberto Franco

