
How to Install Second-Story Subflooring
Installing second-floor floor panels is a matter of consistency and attention to detail. Follow these steps to properly install second-story subflooring.
By Jack Roberts
Once floor joists have been put in place, it’s time to lay down a durable subfloor. The process to install second-story subflooring is relatively straightforward, but taking time to attend to the details involved can radically reduce creaking, groaning ceilings. It also can make life a lot more pleasant for people living and working below your installation job for years to come.
Choosing your second-story subflooring material
Choosing the flooring material is the obvious first step to putting in subflooring. Plywood or oriented strand board (OSB) are the usual choices. Particle board panels are only recommended for floating floors. The contractor putting in subflooring for the barn-themed wedding venue featured here opted for OSB, as it is typically less expensive than plywood. OSB has a trade-off for its affordability, however, as it does not hold nails as well as do plywood panels. You can compensate for this shortcoming by simply specifying thicker, 23⁄32 inch, OSB panels.
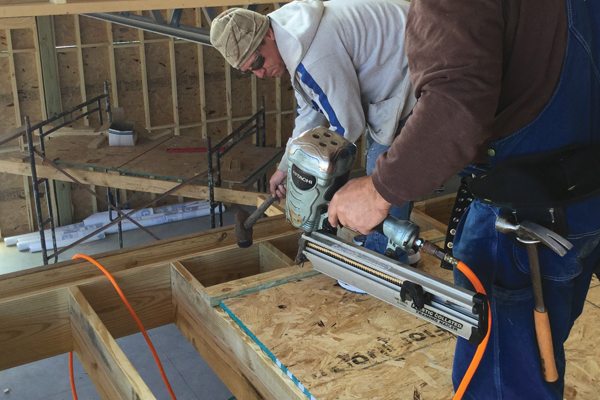
Apply a light coat of construction adhesive to reduce floor squeaking and groaning noises.
Typical subflooring base layers are either 19⁄32 to 11⁄8-inch thick, with most parts of the country requiring at least 3⁄4-inch layers. But traffic and loads (flooring under bathtubs are a prime example) may dictate adding a second subfloor layer for additional strength and durability.
 Most residential floor joists are laid out with 16-inch centers, although some joist frames are set on either 24-inch or 19.2-inch centers. Standard 4 X 8 plywood or OSB panels will break evenly on all three of these configurations.
Calculate subflooring material
Once you’ve decided on your subfloor material, you need to calculate how much of it you will need. The math for determining subflooring material is to simply measure both the width and length of the room in feet and multiply that number by 2. This will give you the area in feet squared. If the floor plan has an L-shaped layout, simply treat the two areas separately using the same basic formula. Home Depot has a handy online calculator that can take a lot of the guesswork out of this process and ensure a more accurate estimate.

Lay the panel in place, taking care to align the interlocking tongue-and-groove system properly.
Most residential floor joists are laid out with 16-inch centers, although some joist frames are set on either 24-inch or 19.2-inch centers. Standard 4 X 8 plywood or OSB panels will break evenly on all three of these configurations.
Having the panels “break on center” is critical to ensure floor strength and long life.
Once the panel is down, a block and hammer can be used to make final adjustments.
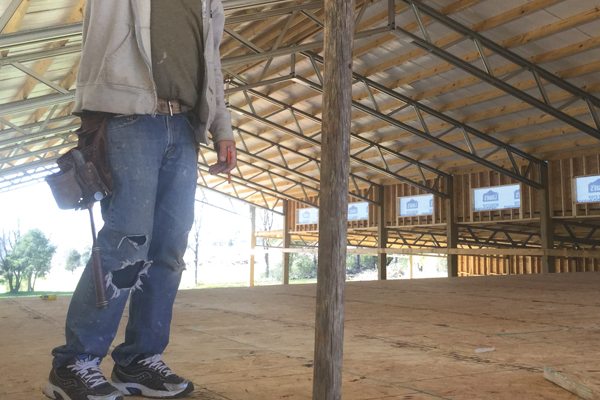
To install second-story subflooring, use sturdy scaffolding to begin the subflooring installation and reduce chance of injury. As paneling is laid, your crew will be able to transition off the scaffolding and begin to work faster in a safe manner.
Floor paneling often features an interlocking tongue-and-groove design that further enhances integrity and reduces squeaking and groaning as the structure ages. Be aware of this and make sure you orient all your paneling to be consistent with that tongue-and-groove pattern as you lay out the initial row of paneling.
Start at a corner at one end of the room, bearing in mind that you will have to measure and cut panels to accommodate any exposed wall beams. A circular saw works well for this job.
Applying construction adhesive
Start by applying a high-quality construction adhesive to the floor joists. This will help keep the panels in place and further reduce any chance of squeaking and popping caused by loose panels. A little adhesive goes a long way, so don’t over-apply.
Taking a few easy steps can guarantee a quality subfloor that will last for years.
Once the adhesive is in place, line the panel up to the wall edge as closely as possible before laying it slowly into position. Once it is in place, check to make sure it is plumb with both walls. Adjust the panel position, if necessary, and then attach to the floor joists using 8p or 12p nails, or wood screws.
Once the first row of paneling is in place against the wall, repeat the process for the second row of paneling being installed. This time, however, use a block and sledgehammer to tap the panel into place and make sure the two boards’ tongue-and-groove patterns interlock correctly.
Repeat this process across the entire floor area to be covered until complete. Depending on the size of the area being covered, you will likely have to use a circular saw to cut down the last row of paneling to ensure a tight fit. Once in place, you should have a strong, yet silent, second-story floor in place that will last for years to come.
